News
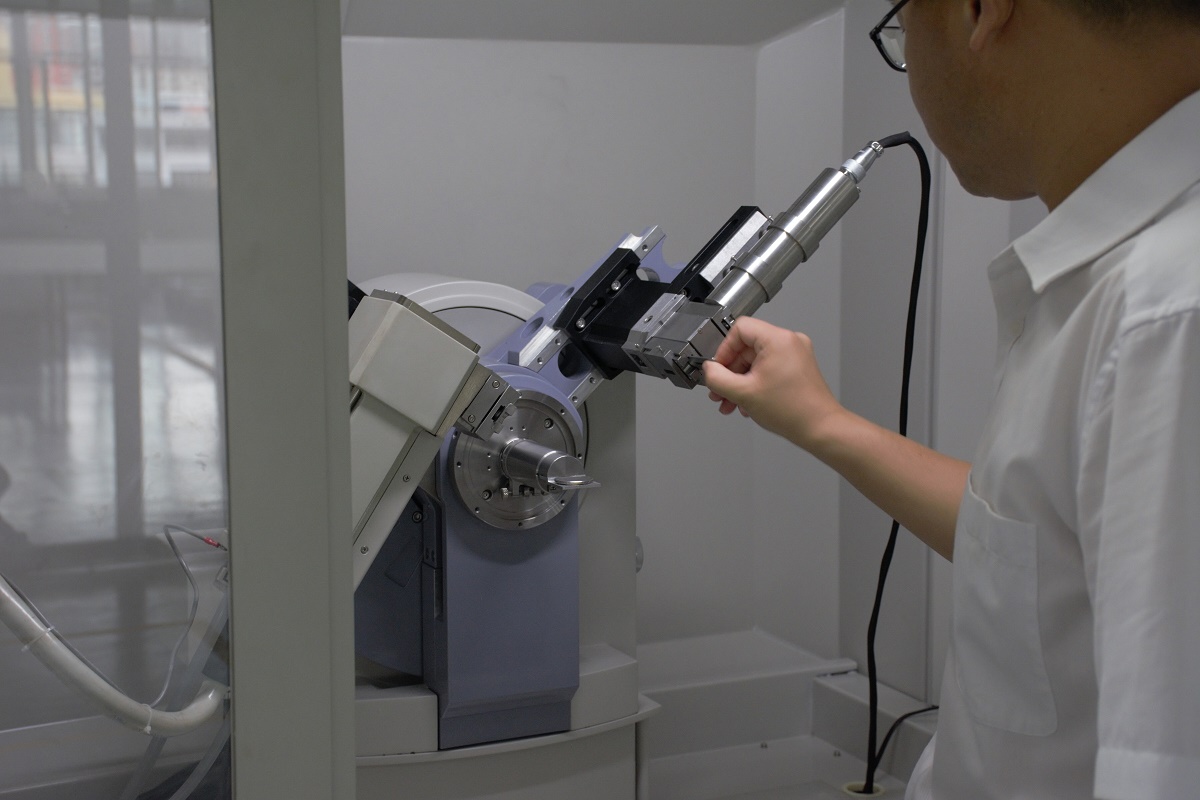
The medium and low temperature accessory of an X-ray diffractometer is a key component used for X-ray diffraction analysis in low-temperature environments.The medium and low temperature accessory is widely used in research and development work in materials science, physics, chemistry, and other fields, especially suitable for scenarios that require structural analysis of materials under different temperature conditions. In order to understand the changes in crystal structure during low-temperature refrigeration process, the following are the technical parameters of the medium and low temperature accessory: Vacuum environment:- 196~500℃ Temperature control accuracy: ± 0.5 ℃ Refrigeration method: liquid nitrogen (consumption less than 4L/h) Window material: Polyester film Cooling method: deionized water circulation cooling In short, the medium and low temperature accessory of X-ray diffractometer is important equipment component that can provide strong support for scientific research and material analysis.The medium and low temperature accessory of a diffractometer is one of the important tools in the field of material structure analysis, with broad application prospects and significant research value.The medium and low temperature accessory of the diffractometer is a key component to ensure the normal operation and accurate measurement of the instrument under low-temperature conditions. Its design and performance directly affect the accuracy and reliability of experimental results. When selecting and applying medium and low temperature accessory, experimental requirements, sample characteristics, as well as the technical parameters and performance characteristics of the accessories should be fully considered to ensure the best experimental results.
The X-ray irradiator generates high-energy X-rays to irradiate target objects or biological tissues. The generation of X-rays is usually achieved by accelerating electrons to collide with metal targets (such as tungsten, copper, etc.), generating bremsstrahlung and forming X-ray beams, which then irradiate cells or small animals. X-ray irradiator is used for various basic and applied research. Historically, radioactive isotope irradiators were used, which required transporting samples to a core irradiation facility. However, today, smaller, safer, simpler, and lower cost X-ray irradiator can be installed in laboratories for convenient and rapid irradiation of cells. Various samples can be directly irradiated in the laboratory without affecting fertility or safety. The X-ray irradiator is convenient for personnel who have not received professional X-ray training to use, and there are no expensive license applications or safety or radiation source maintenance costs. The X-ray irradiator is easy to operate, safe, reliable, and cost-effective, and can replace radioactive isotope sources. 1. The main application areas of X-ray irradiator include medical field, scientific research field, etc 2. Safety precautions for X-ray irradiation equipment: Radiation protection: Operators need to wear protective clothing to avoid prolonged exposure to X-rays. Equipment maintenance: Regularly inspect the equipment to ensure its normal operation and prevent radiation leakage. Dose control: Strictly control the irradiation dose to avoid unnecessary harm to the sample or human body.
The principle and application of NDT portable X-ray welding testing machine: NDT portable X-ray welding testing machine is the use of the acoustic, optical, magnetic, and electrical properties of materials to detect the presence of defects or unevenness in the tested object without damaging or affecting its performance. It provides information on the size, location, nature, and quantity of defects. Compared with destructive testing, non-destructive testing has the following characteristics. The first is non-destructive, as it does not compromise the performance of the detected object during testing; The second is comprehensive, as the detection is non-destructive, it is necessary to conduct a 100% comprehensive detection of the tested object, which cannot be achieved by destructive detection; The third is comprehensive, and destructive testing is generally only applicable to the testing of raw materials, such as tension, compression, bending, etc. commonly used in mechanical engineering. Destructive testing is carried out on manufacturing raw materials, and for finished products and in use items, destructive testing cannot be carried out unless they are not intended to continue to serve. Non destructive testing, on the other hand, does not damage the performance of the tested object. So, It can not only perform full process testing on manufacturing raw materials, intermediate processes, and even final products, but also test equipment in service. Characteristics of NDT portable X-ray welding testing machine: The X-ray generator has a small volume, with an anode grounded and forced cooling by a fan; ◆ Lightweight, easy to carry, and simple to operate; Work and rest in a 1:1 ratio; Beautiful appearance and reasonable structure; ◆ Delayed exposure to ensure operator safety; The main purpose of NDT portable X-ray welding testing machine : The main purpose of the equipment is to inspect the processing and welding quality of materials and components such as ship hulls, pipelines, high-pressure vessels, boilers, aircraft, vehicles, and bridges in industrial sectors such as national defense, shipbuilding, petroleum, chemical, mechanical, aerospace, and construction, as well as internal defects and the inherent quality of various light metals, rubber, ceramics, etc.
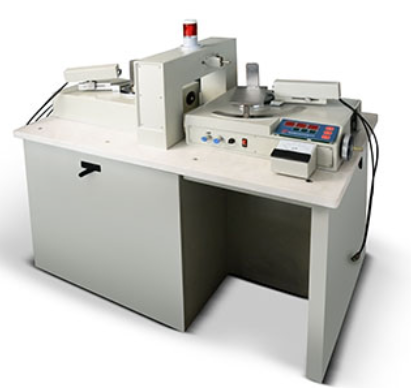
The X-ray crystal orienter operates based on the principle of X-ray diffraction. The high voltage generated by the high-voltage transformer acts on the X-ray tube, producing X-rays. When the X-ray is irradiated onto the sample, diffraction occurs when the Bragg diffraction condition (n λ=2dsin θ) is satisfied. Among them, λ is the wavelength of X-rays, d is the spacing between atomic planes inside the crystal, and θ is the angle between the incident X-rays and the crystal plane. The diffraction line is received by the counting tube and displayed on the microampere meter of the amplifier. When using a monochromator, the diffraction line is monochromatized and then received by the counter and displayed on the microampere meter of the amplifier, thereby improving measurement accuracy. The X-ray crystal orienter can accurately and quickly determine the cutting angle of natural and artificial single crystals (piezoelectric crystals, optical crystals, laser crystals, semiconductor crystals), and is equipped with a cutting machine for directional cutting of the above-mentioned crystals. X-ray crystal orienter is an indispensable instrument for precision machining and manufacturing of crystal devices. The X-ray crystal orienter is widely used in the research, processing, and manufacturing industries of crystal materials. The X-ray crystal orienter is easy to operate, does not require professional knowledge or skilled techniques, displays the angle digitally, is easy to observe, and reduces reading errors. The display of the X-ray crystal orientation instrument can be zeroed at any position, making it easy to display the deviation value of the chip angle. The dual angle measuring instrument can work simultaneously, improving efficiency. The X-ray crystal orienter has a special integrator with peak amplification, which improves the detection accuracy. The integration of X-ray tube and high-voltage cable increases high-voltage reliability. The detector high-voltage adopts DC high-voltage module and vacuum suction sample board, which improves the angle measurement accuracy and speed. Overall, the X-ray crystal orienter is a precision instrument based on the principle of X-ray diffraction, which provides important technical support for crystal material research and related applications by accurately measuring the cutting angle of crystals.
The Small angle diffractometer accessories are important accessories used in X-ray diffractometers. Small angle diffractometer accessories enable X-ray diffraction measurements to be taken within a very small angle range, from 0°to5°, for thickness testing of nano multilayer films. Plays an important role in fields such as materials science, physics, chemistry, and biology. Common types and characteristics: Parallel light thin film accessory: This accessory can generate parallel X-ray beams and is suitable for small angle diffraction measurements of thin film samples. It can improve the accuracy and resolution of measurements, reduce measurement errors caused by beam divergence, and better adapt to thin film samples of different thicknesses and properties. Multi functional sample stage: Equipped with small angle diffraction accessories, the multifunctional sample stage can provide various testing environments for samples, such as in-situ heating, cooling, stretching, etc. This makes it more convenient to study the structural changes of materials under different external conditions, and enables real-time observation of the structural response of materials during temperature, stress, and other changes. The Small angle diffractometer accessories play important role in multiple fields such as materials science, physics, chemistry, and biology by achieving small angle diffraction and precise measurement of nano multilayer film thickness, providing researchers with a powerful tool for in-depth exploration of material microstructures and properties.
Fiber accessories are tested for their unique crystal structure using X-ray diffraction (transmission) method. Test the orientation of the sample based on data such as fiber crystallinity and half peak width. A specialized component used for analyzing fiber materials such as textiles, polymer fibers, biological fibers, etc. It is commonly used to study the crystal structure, orientation, and molecular arrangement of fibers. Main functions of fiber accessories: 1. Fiber sample fixation: Fiber accessories are used to fix the fiber sample, ensuring its position and direction stability in the X-ray beam. 2. Fiber orientation analysis: By adjusting the position and angle of the sample, the crystal orientation and molecular arrangement of the fibers are studied. 3. Small angle X-ray scattering (SAXS): Some fiber attachments support SAXS for analyzing the nanoscale structure of fibers. Common types of fiber accessories: 1. Fiber stretching device: It can apply tension to fibers during XRD analysis to study structural changes under stress. 2. Rotating sample stage: allows fiber samples to rotate, facilitating the collection of diffraction data from different angles. 3. Temperature control accessories: used to analyze fiber materials at specific temperatures and study the effect of temperature on structure. Application fields of fiber accessories: 1. Materials Science: Study the crystal structure and mechanical properties of synthetic fibers such as nylon and polyester. 2. Biomaterials: Analyze the structure of natural fibers such as collagen and cellulose. 3. Textiles: Evaluate the orientation and crystallinity of textile fibers. Steps for using fiber accessories: 1. Sample preparation: Fix the fiber sample onto the attachment. 2. Adjust parameters: Set the X-ray source, detector, and sample positions. 3. Data collection: Collect diffraction patterns. 4. Data analysis: Use software to analyze diffraction data and obtain structural information. Matters needing attention: -Sample alignment: Ensure that the sample is accurately aligned with the X-ray beam. -Parameter optimization: Optimize X-ray energy, exposure time, etc. based on sample characteristics. -Data quality: Ensure clear diffraction patterns and avoid noise interference. Our company provides on-site training on instrument usage and related industry knowledge, as well as subsequent analysis software usage and maintenance, and complete machine maintenance services.
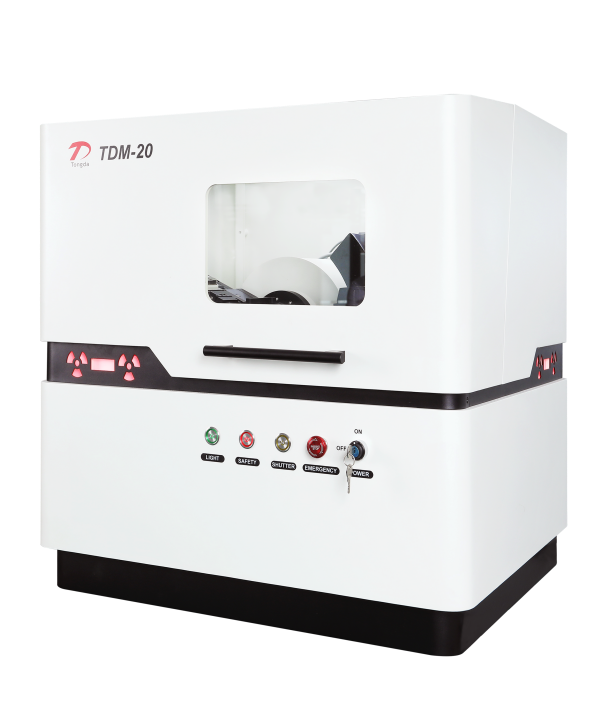
The TDM-20 Benchtop X-ray diffractometer uses a new high-performance array detector, and the loading of this detector has greatly improved the overall performance of the machine. The TDM-20 Benchtop XRD is mainly used for phase analysis of powders, solids, and similar paste like materials. The TDM-20 Benchtop X-ray diffractometer utilizes the principle of X-ray diffraction to perform qualitative or quantitative analysis, crystal structure analysis, and other polycrystalline materials such as powder samples and metal samples. Benchtop XRD is widely used in industries such as industry, agriculture, national defense, pharmaceuticals, minerals, food safety, petroleum, education, and scientific research.
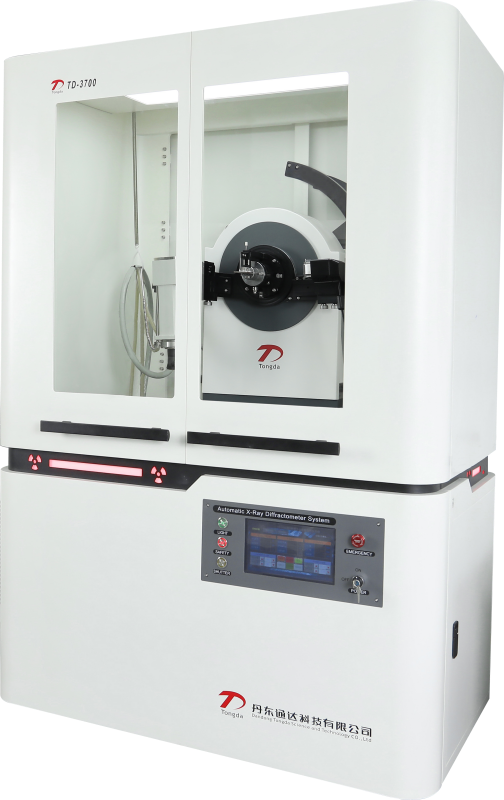
The TD-3700 high-resolution X-ray diffractometer is equipped with a variety of high-performance detectors such as high-speed one-dimensional array detectors, two-dimensional detectors, SDD detectors, etc. TD-3700 X-ray diffractometer integrates fast analysis, convenient operation, and user safety. The modular hardware architecture and customized software system achieve a perfect combination, making its failure rate extremely low, anti-interference performance good, and ensuring long-term stable operation of high-voltage power supply. TD-3700 X-ray diffractometer can increase the diffraction calculation intensity by tens of times or more, obtain complete high-sensitivity, high-resolution diffraction patterns and higher counting intensity in a shorter sampling period, and also support transmission data scanning. The resolution of transmission mode is much higher than that of diffraction mode, which is suitable for structural analysis and other fields. Diffraction mode has strong diffraction signals and is more suitable for routine phase identification in the laboratory.
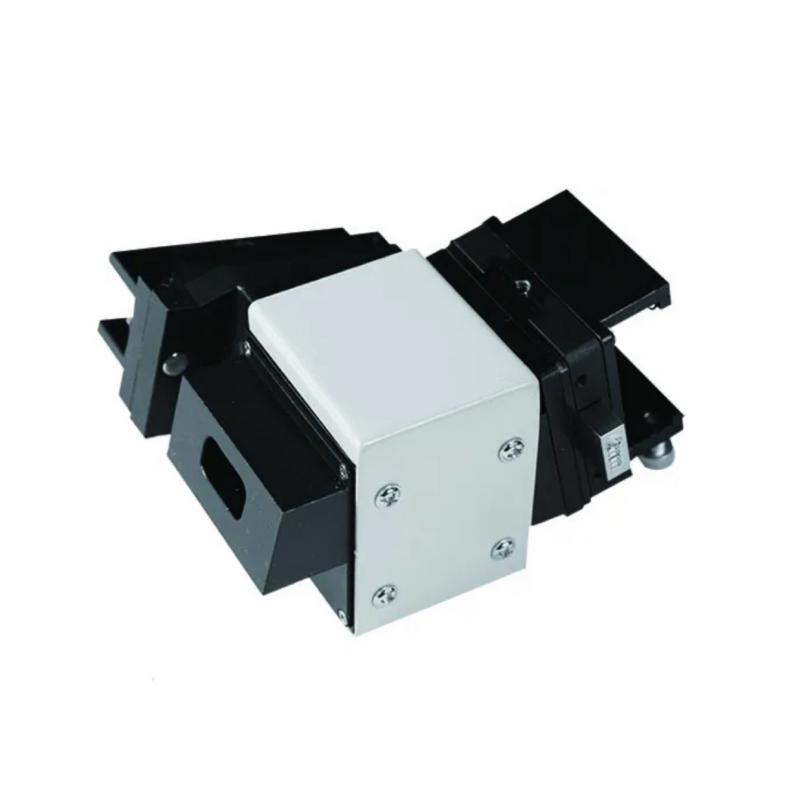
The parallel optical film measuring accessory increases the length of the grating plate to filter out more scattered lines, which is beneficial for reducing the influence of the substrate signal on the results and enhancing the signal intensity of the film.
Fiber accessories are tested for their unique crystal structure using X-ray diffraction (transmission) method. Test the orientation of the sample based on data such as fiber texture and half peak width.